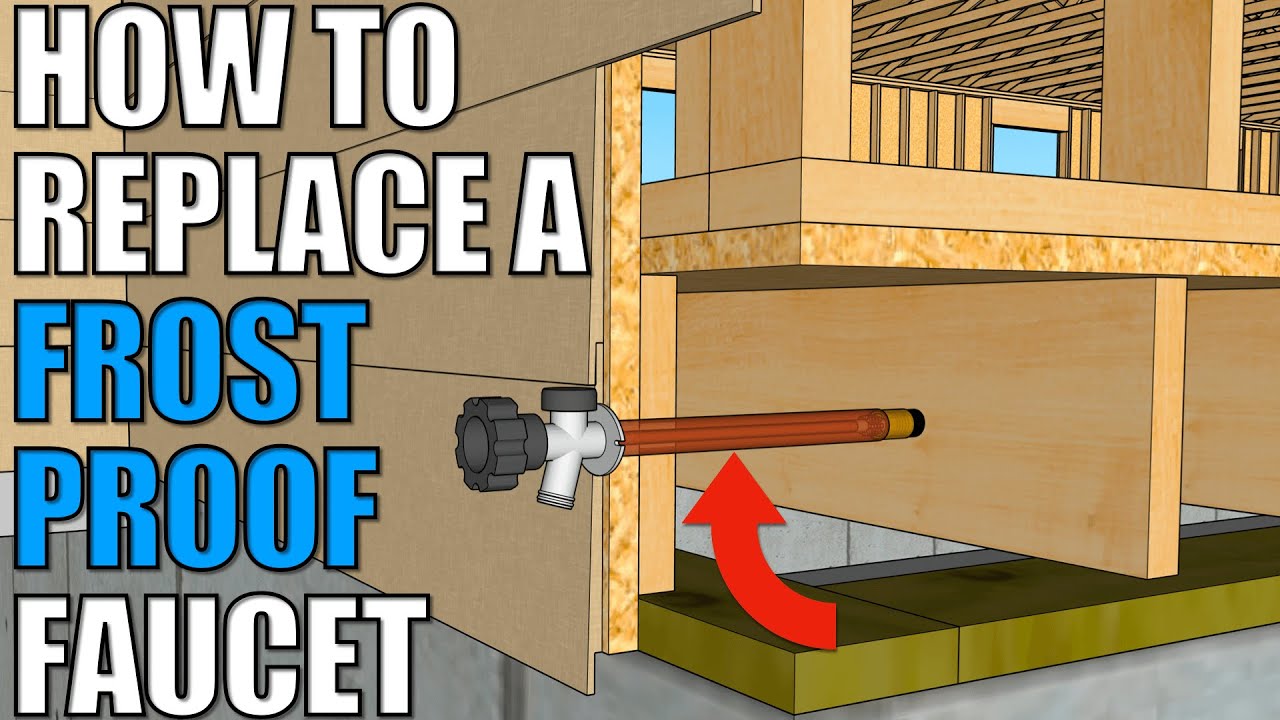
Replacing a frost-proof faucet, commonly known as a sillcock, is a manageable DIY task that can enhance your home’s plumbing system. These faucets are designed to prevent freezing in colder climates by extending the valve mechanism inside the home, away from the exterior wall. Here’s a step-by-step guide to assist you:
Materials and Tools Needed:
- Replacement frost-proof faucet
- Adjustable wrench
- Pipe cutter
- Plumber’s tape (Teflon tape)
- Silicone caulk
- Drill with masonry bits (if installing into brick or stone)
- Screwdriver
- Bucket or towels (to catch residual water)
Step 1: Turn Off the Water Supply
Locate the shut-off valve for the outdoor faucet, typically found in the basement or crawl space near the faucet’s interior connection. Turn it clockwise to close. If no individual shut-off valve exists, you’ll need to turn off the main water supply to your home.
Step 2: Drain the Existing Faucet
Open the outdoor faucet to release any remaining water. This step is crucial to prevent water from spilling when removing the old faucet.
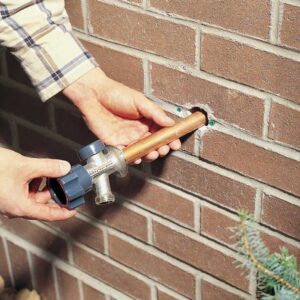
Step 3: Remove the Old Faucet
Using an adjustable wrench, loosen the nut connecting the faucet to the supply pipe inside the house. Once loosened, remove the faucet from the wall. Be prepared for some residual water to drain out.
Step 4: Prepare the Supply Pipe
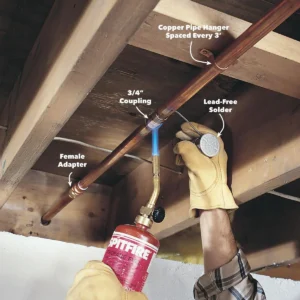
Clean the exposed end of the supply pipe using emery cloth to remove any debris or corrosion. Ensure the pipe is smooth and free of obstructions.
Step 5: Install the New Faucet
Apply plumber’s tape to the threads of the new faucet’s pipe to ensure a watertight seal. Insert the faucet through the wall opening, aligning it properly. From inside, thread the faucet’s pipe into the supply pipe and tighten the connection with an adjustable wrench.
Step 6: Secure the Faucet
If your faucet has mounting screws, drill pilot holes into the wall and secure the faucet using screws. Apply silicone caulk around the flange of the faucet to seal any gaps and prevent water infiltration.
Step 7: Test the Installation
Turn the water supply back on and open the new faucet to check for leaks. If any leaks are detected, tighten the connections as needed.
For a visual demonstration of this process, you might find the following video helpful: