Are you thinking about installing new floor tiles in your home or office but not sure where to start? In this article, we will discuss the best techniques for the installation of floor tiles, as well as how to properly prepare the floor and wall for tiling.
Preparing the Floor and Wall for Tiling
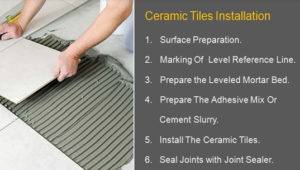
Before you begin installing floor tiles, it is important to properly prepare the area to ensure a smooth and long-lasting finish. Here are the steps you should follow:
- Clean the Surface: Begin by thoroughly cleaning the floor and wall where the tiles will be installed. Remove any dust, dirt, or debris to ensure a clean, flat surface for the tiles to adhere to.
- Repair any Damage: If there are any cracks, holes, or uneven areas in the floor or wall, you will need to repair them before tiling. Use a suitable filler to patch up any imperfections and allow it to dry completely before proceeding.
- Prime the Surface: To ensure proper adhesion of the tiles, it is recommended to prime the surface before tiling. This will help to seal the surface and provide a better bond for the tile adhesive.
- Layout the Tiles: Before you start tiling, carefully measure the area and plan out the layout of the tiles. This will help you determine the starting point and ensure that the tiles are evenly spaced and aligned.
Installing the Floor Tiles

Now that you have prepared the floor and wall, it is time to start installing the tiles. Follow these steps for a successful tile installation:
- Mix the Adhesive: Prepare the tile adhesive according to the manufacturer’s instructions. Make sure to mix it to the right consistency to ensure proper adhesion.
- Apply the Adhesive: Using a trowel, spread the adhesive onto the prepared surface in small sections. Make sure to work in manageable areas to prevent the adhesive from drying out before you can lay the tiles.
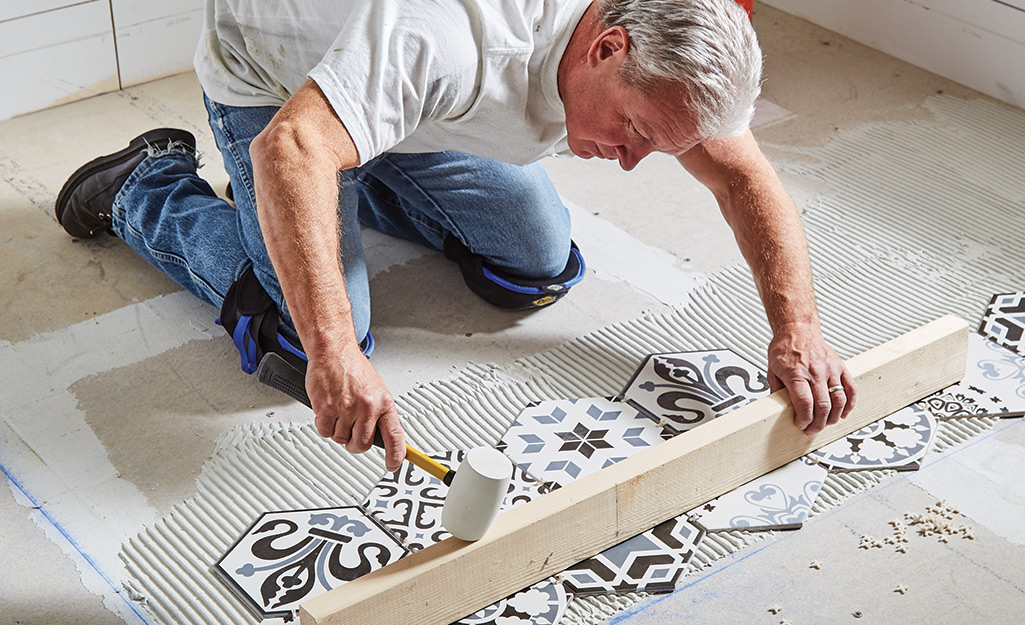
- Lay the Tiles: Carefully place the tiles onto the adhesive, gently pressing them into place. Use spacers to ensure even spacing between the tiles and adjust them as needed.
- Cut Tiles as Needed: If you encounter obstacles such as corners or edges, you may need to cut the tiles to fit. Use a tile cutter or a wet saw to make precise cuts.
- Grout the Tiles: Once the tiles are in place and the adhesive has set, it is time to grout the joints. Apply the grout with a rubber float, pressing it into the spaces between the tiles. Wipe off any excess grout with a damp sponge.
- Seal the Grout: To protect the grout from staining and water damage, it is recommended to seal it after it has fully cured. This will help to prolong the life of your tiled floor.
By following these techniques for installing floor tiles and properly preparing the floor and wall, you can achieve a beautiful and long-lasting tile installation in your home or office. Remember to take your time, work carefully, and seek professional help if needed to ensure the best results.